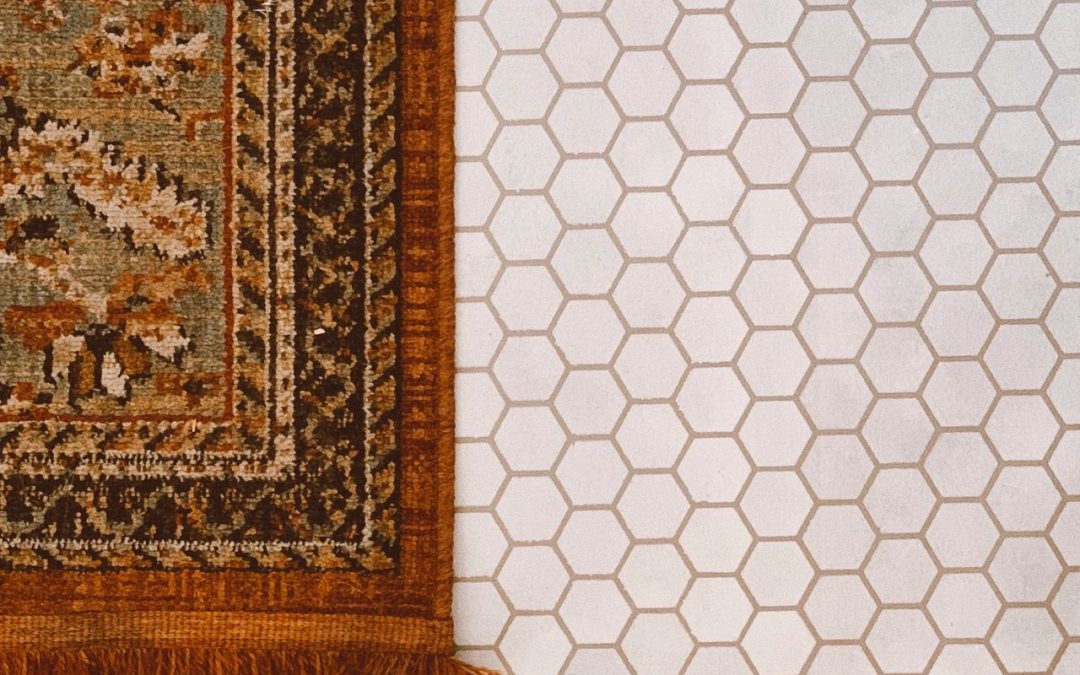
Are you ready for a super simple, affordable, tool-free way to cover your outdated vinyl or linoleum floors?? Then keep reading, boo! We recently bought a small 90’s builder grade home, complete with grungy carpet and brown vinyl floor. New floors aren’t in the budget right now, so I decided to try my hand at stenciling. While it is a bit time consuming, it’s surprisingly simple! I have seen some incredible stenciled floors, so creative and unique. What I wanted for my kitchen was a realistic looking “hex tile”, and I’m going to show you exactly how I accomplished it!
What you’ll need:
+ Painters Tape
+ Primer
+ Floor Paint (tinted to your base or “grout” color). I chose “Ashen Gray” by Valspar and its the perfect tan/gray. It helped achieve the realistic look!
+ Floor Paint (tinted to your “tile” color). They were unable to tint the above paint with the white I wanted for the “tile”, so I went with the Rustoluem Ultra Cover White Paint, and it worked just fine.
STEP 1: Clean your floors thoroughly. In order for your paint to go on smoothly, it needs a clean, smooth surface. I vaccumed and scrubbed my floor with a Goo Gone spray to ensure it was clean.
STEP 2: Once your floors are clean and dry, you’re ready to prime! I used a roller to apply my primer, and I made sure to apply a thick coat. I let it dry for the suggested 1 hour before moving to the next step.
STEP 3: Apply your base coat of floor paint! This color will be your “grout” color once you stencil over it. With a roller, I applied one thick coat of the Floor Paint in “Ashen Gray” and allowed to dry overnight before moving on.
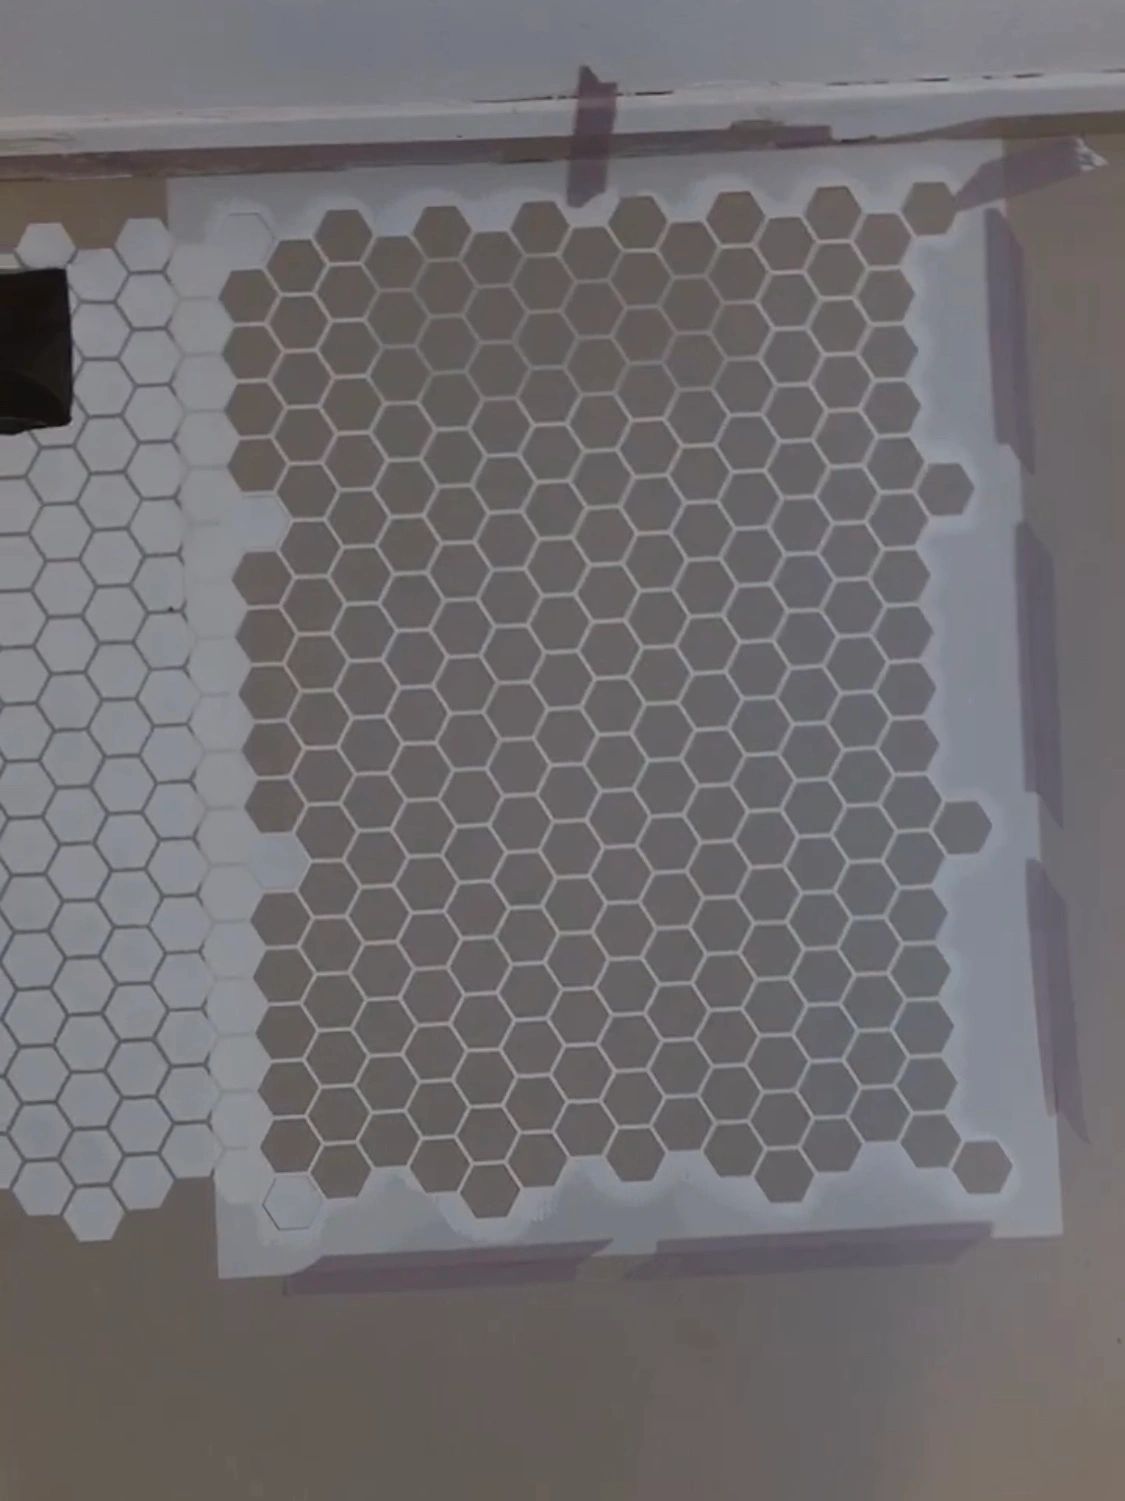
STEP 4: You’re ready to stencil! Before stenciling, I vacummed gently one more time just to ensure there were no crumbs or dog hair. (I missed some hairs and they are forever part of our kitchen floor). Start with your stencil in a far corner and work out from there. It is very important that you tape down every side of the stencil so that it doesn’t move around while you’re painting.
STEP 5: Start stenciling! Use your stencil brush and get a TINY amount of paint on your brush. Dab on a paper towel to wipe off excess. I can’t stress enough how important it is to make sure you don’t have too much paint on your brush. This will cause bleeding through the stencil and you won’t get the crisp, clean lines that make it look so realistic. It was helpful for me to practice in an area that wouldn’t show, just to get a feel for how the brush worked.
Once you have completed an entire section with your stencil, set a timer for 30 minutes to allow the paint to dry before pulling the stencil up to start the next section. This is where the project becomes time consuming, because you have to wait a half hour between each section. DO NOT lift stencil before the timer goes off, the lines will smear and you will curse my name.
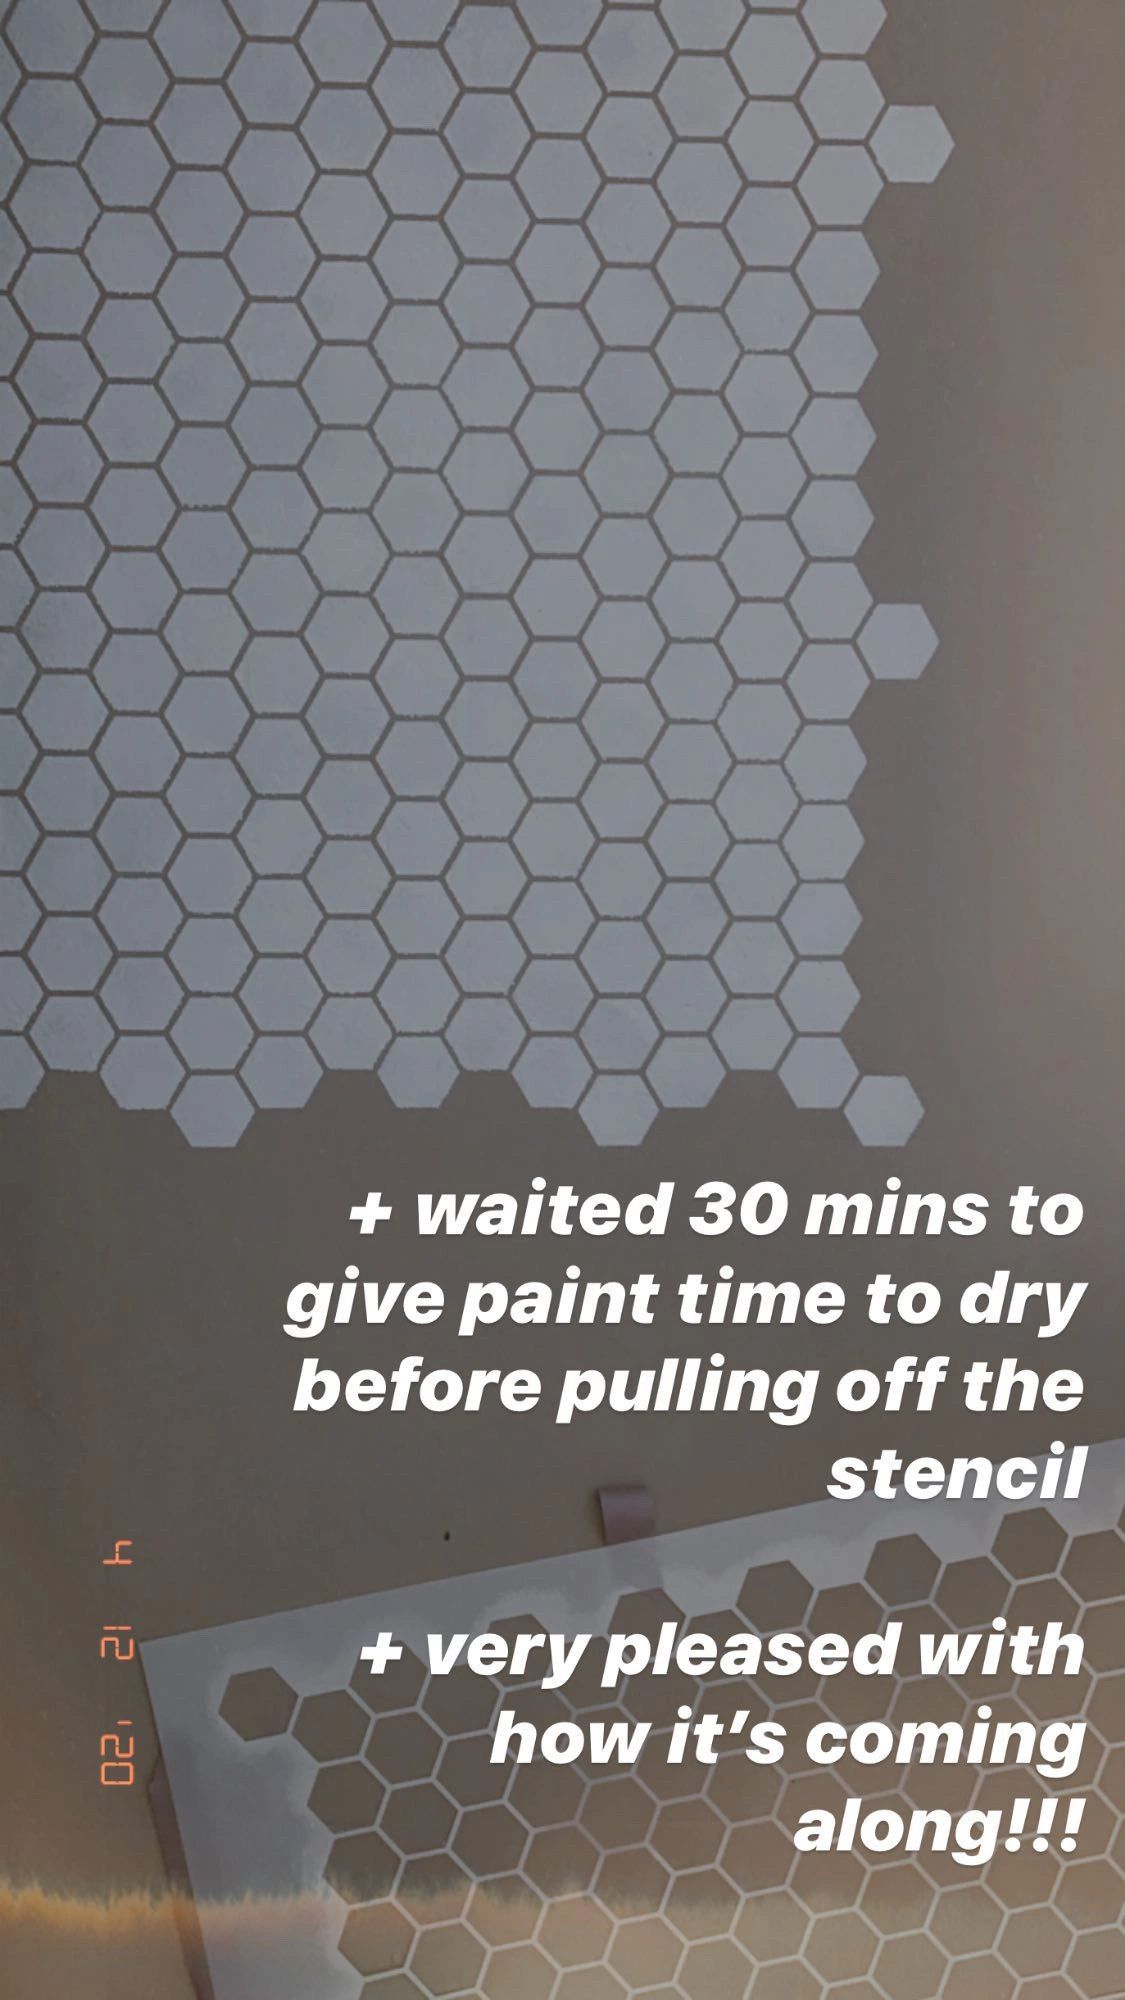
STEP 6: After your 30 minutes of drying time, gently lift the stencil and appreciate your hard work!! Overlap your stencil with the the tiles you just painted, and tape down and repeat!
STEP 7: Once you’ve completed the main part of the floor, you will have to cut up your stencil to get around the edges. I also used this time to correct any bleeding I saw with a small watercolor brush.
STEP 8: I allowed the paint to dry overnight before sealing. I also vaccumed gently again.
STEP 9: Seal, baby, seal! This part is so important, especially if you’re stenciling a high traffic area, such as a kitchen. I used a brush to apply my seal, as it caused less bubbling that way. I applied 3 coats total, waiting 2 hours between each coat.
Wow, writing this out, it seems like a lot. But I promise you, it was so simple and actually extremely therapeutic. You can see how it becomes a lengthy process though, with all the drying time. If you are a visual person like I am, I saved the entire process on my Instagram, where I also answered some questions you might find helpful. If you follow this tutorial, be sure to tag me on Instagram so I can see!! Good luck + happy stenciling!!
Here’s a little before & after to get your juices flowin’.