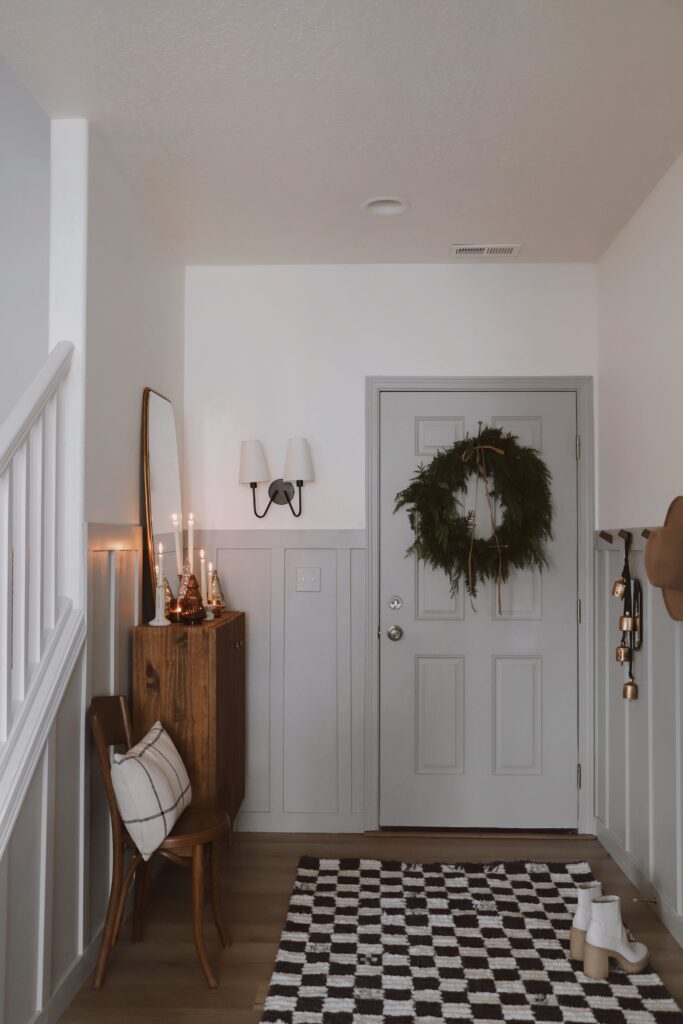
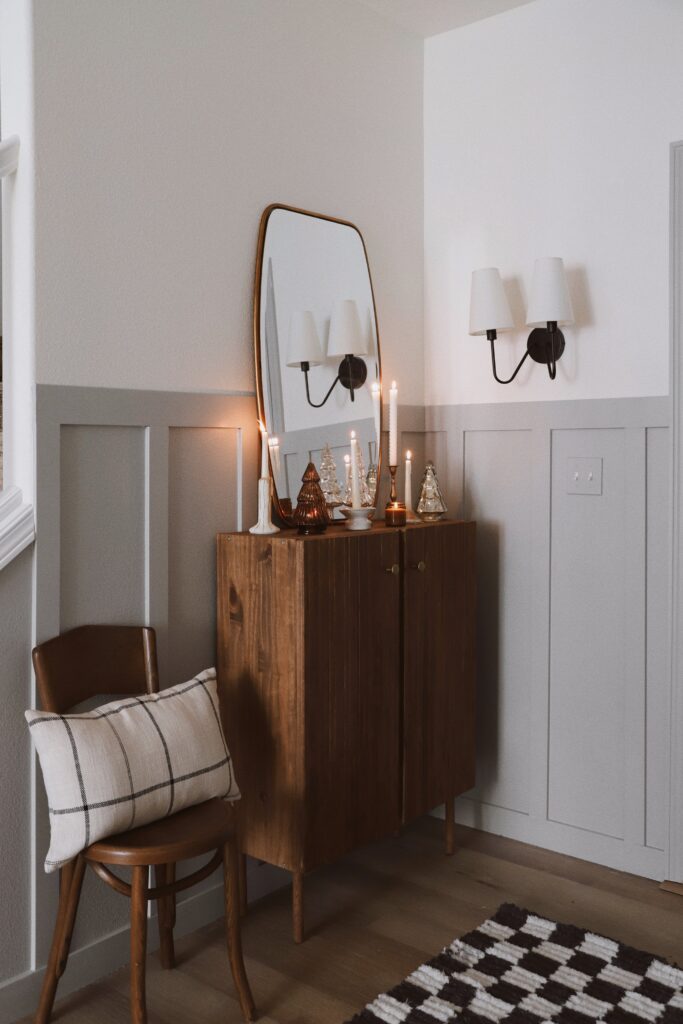
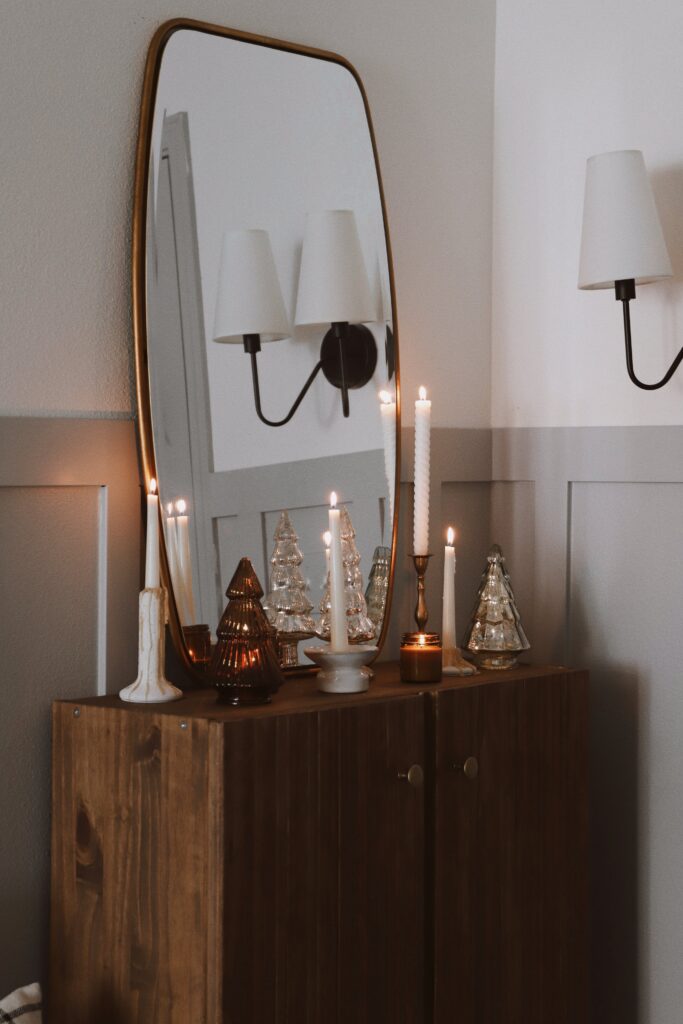
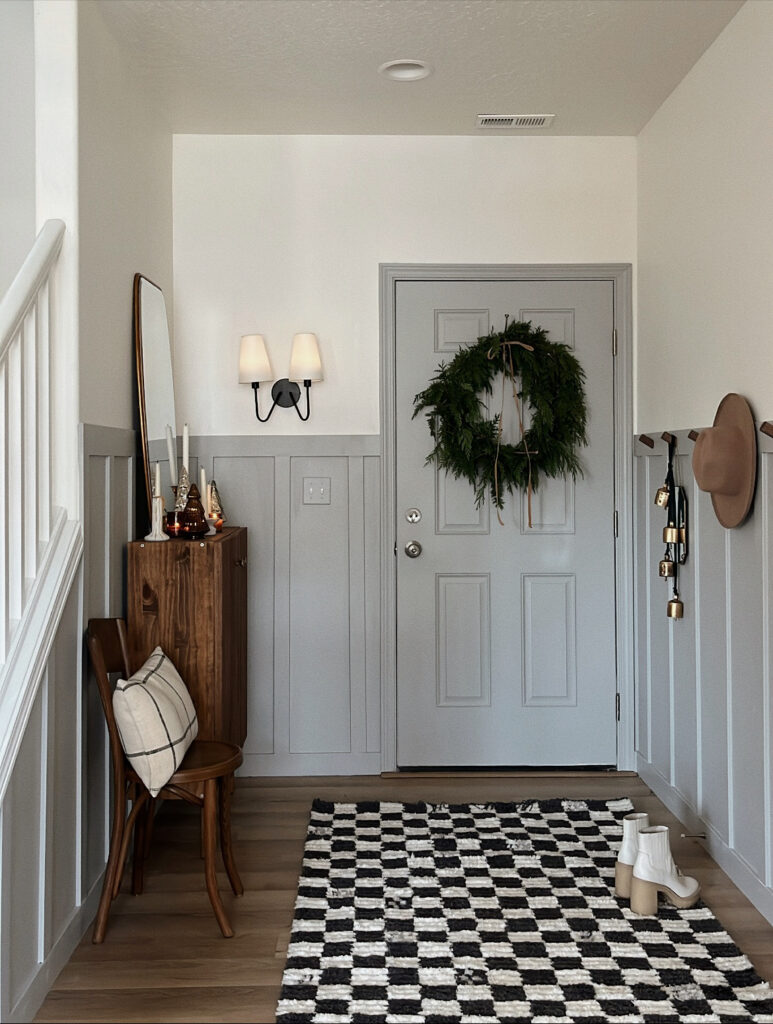
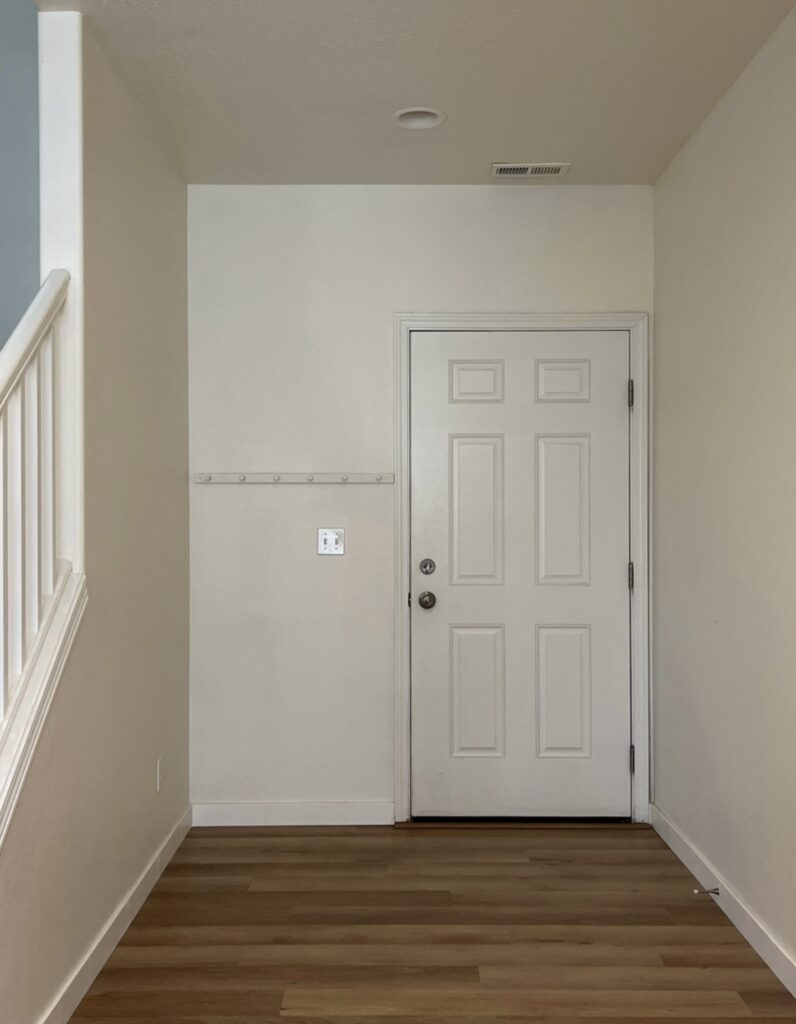
I know you’ve seen this feature wall everywhere, but there’s a reason for it! Board and batten walls have been around for years and it seems like they’ve made an epic return over the last few years in a BIG way. I’ve fallen victim to the trend and have installed three of them throughout our current home and our last home. They’re easy to install, they go with every style, and they’re so fun to personalize with paint colors, wall hooks and decor.
Plus, the total cost for this project was under $150!
Product List:
Paint: I used “Coventry Gray” by Benjamin Moore
Tools:
Hand Sander
** Miter saw is optional if you choose to get your wood cut to your desired length at the hardware store. This is why I love Home Depot, I just give them my exact measurements and they make all the cuts for free!
Step 1: Decide on your materials
If you’ve done any scrolling through Pinterest, I’m sure you’ve noticed that almost every board and batten wall looks just a little different than the last. Some use thicker boards, some use thinner. Some boards are closer together, some have more space in between. There is no right or wrong answer and in the end, they all look amazing! I decided to go with these specific 1×4’s because they are an exact match to our existing floor trim, plus they are pre-primed and ready to be painted! Score! Matching your baseboards in thickness and depth is a good idea if you don’t want to add any extra steps or cost to this project. For the vertical boards, I went with a smaller size: these 1×2’s. Again, all of this is up to you and your preference, but this is what I did.
I should also mention that my walls are slightly textured and I chose to go without installing backing behind the boards as traditional board and batten is usually installed. If your walls are extremely textured or you just prefer the look of the smooth finish, use this backer board!
Step 2: Measure, measure, measure!
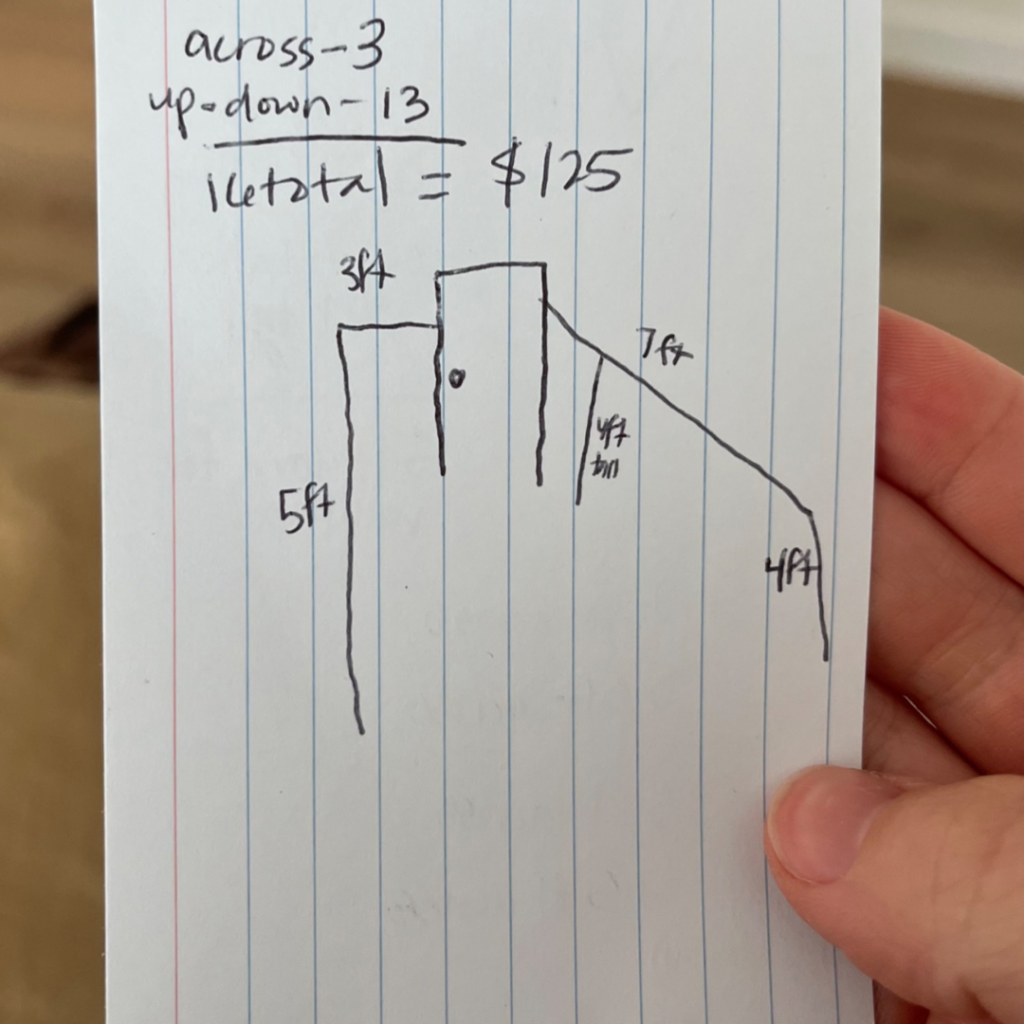
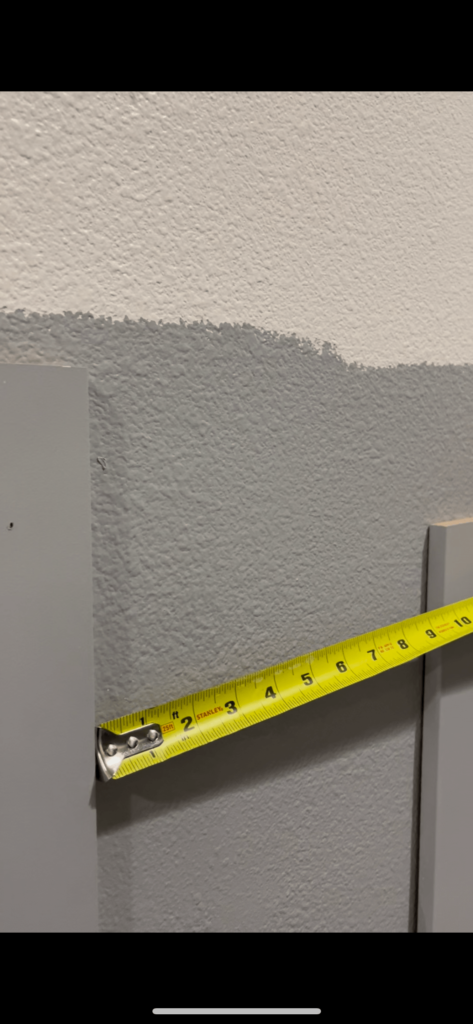
There are few different measurements you should take before ordering any materials. First, you need to measure the length of the wall(s) for the horizontal board that will go on top of your vertical ones.
Next, you need to decide the height of your board and batten wall. Again, this is entirely up to your preference but I’ll walk you through some deciding factors that you should consider.
I chose to take my vertical boards up 4ft for a couple of reasons. The first being that we have 8.5ft ceilings and I just liked the look of 4ft! I also added hooks on one of the walls and 4ft was the perfect height to hang coats and bags from. The last reason was that the boards I bought for this project came in a length of 8ft, meaning I could just get them all cut in half and they would be the perfect length. (I like the least amount of math as possible, hehe).
Lastly, you need to decide how far apart you’d like to space your vertical boards. At first, I wanted to space mine out 12 inches but assessing where outlets and doorways were, 10 inches worked best. Again, there is no right answer for width between boards, so just do what’s best for your space!
Step 3: Paint
After installing three board and batten walls, I’ve got it down to a science. The best way to get everything painted but avoid drips is to paint your boards before nailing them up. This way they have time to dry laying down and you don’t have any drips to take care of! I also paint the wall before hanging up the boards and then go back in with touch ups after the boards are up.
Step 4: Install your boards
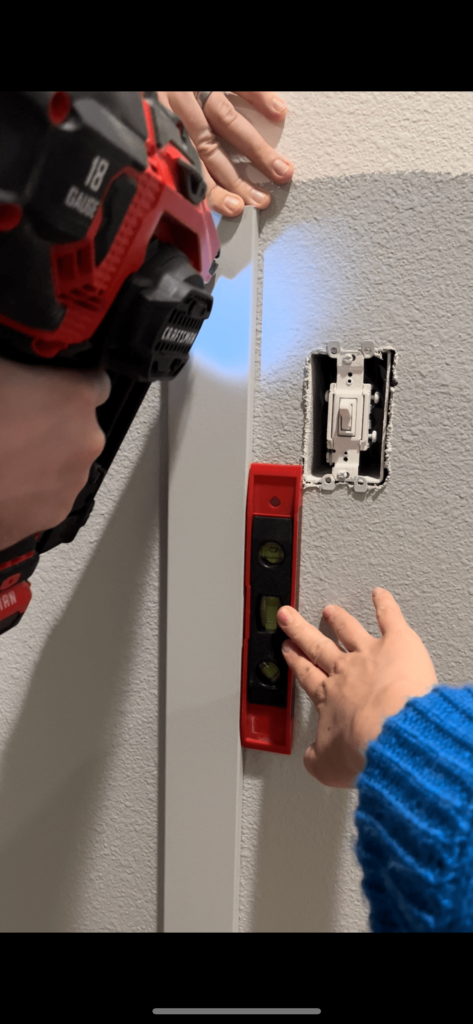
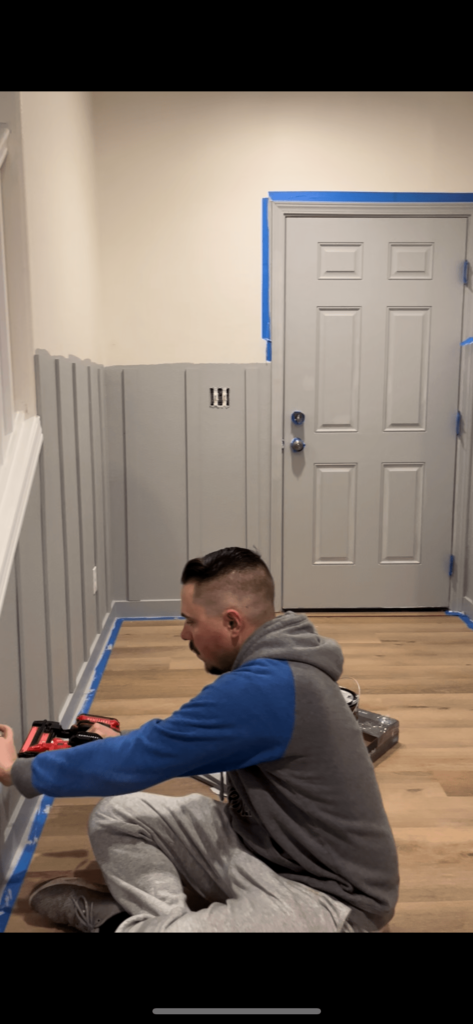
Some people prefer to install the top horizontal board first, but I prefer to start with the vertical boards. Do whatever makes the most sense to you, there’s no right or wrong answer here! Using a level is crucial in this step, so don’t skip it!
I highly recommend measuring and marking out where you want your boards before installing them. I started from the middle of each wall and leaned a board against the wall every 10 inches until getting to each end. If you find that your end boards are not evenly spaced, adjust the layout accordingly so that you have an even amount of space at each end. If you have outlets to work around, that’s a good place to start, too. Make the layout work for you and your space.
Now that you have your layout figured out, grab your level, tape measure and nail gun. It’s helpful to have an extra set of hands for this step. Nail one vertical board at a time and ensure that it is level before nailing. My husband and I found it easiest to nail a board up and then grab the tape measure and measure out 10 inches from the end of the fastened board. This way we were confident about where to start the next board. (You could also cut an extra piece of board to your desired gap length and stick that in between each board as a spacer).
After your vertical boards are up, install the horizontal board on the top.
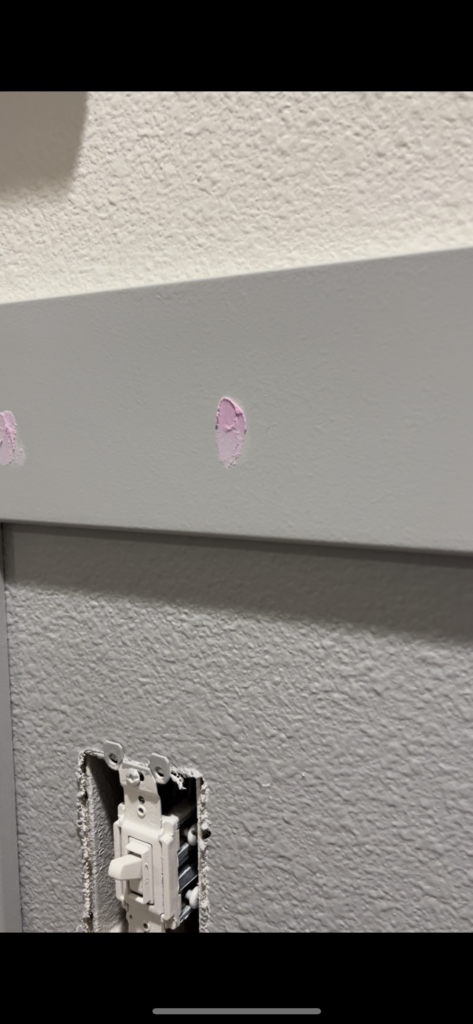
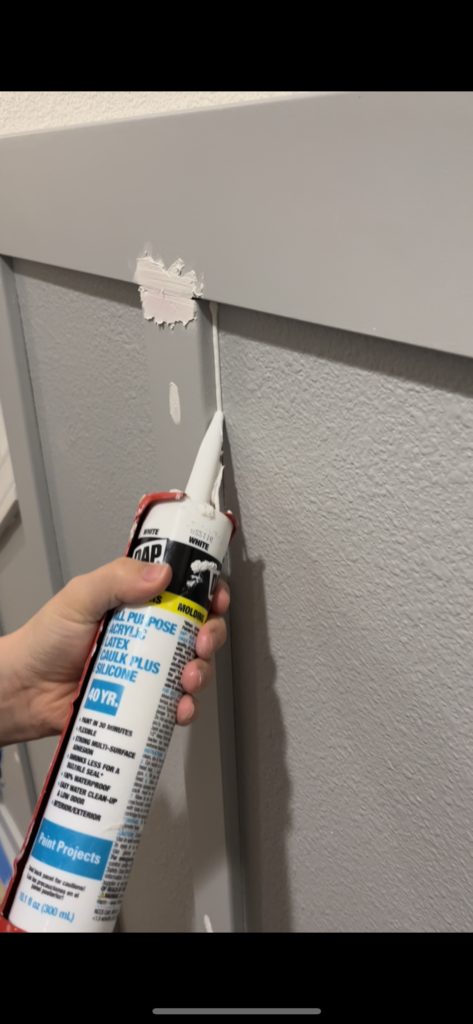
Step 5: Spackle + caulk the holes + gaps
Fill each nail hole generously with spackle. Once it’s dry you will sand it down until smooth so don’t be afraid to add a little extra to ensure that it will be flush with the board once sanded. While the spackle is drying you can caulk where needed. I think caulk makes the board and batten look more seamless, so I like to add along every side of every piece of wood. I also fill the gap where the the horizontal and vertical boards meet. Once everything has fully dried, take a hand sander and sand down your spackle until you have a smooth and seamless finish! Make sure to clean up all traces of sand and dust from the boards and wall before moving on!
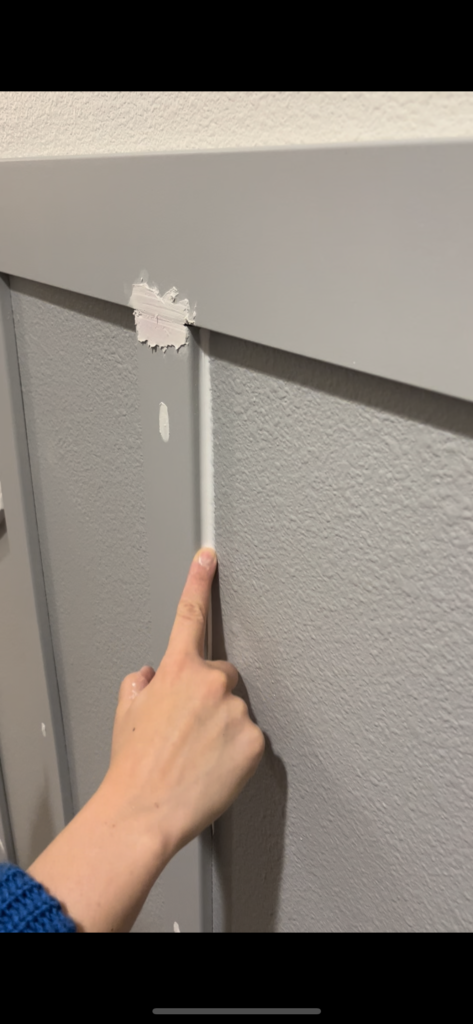
Step 5: Finishing Touches on your Board and Batten
I use a brush to get in the seams where I caulkled and a small roller to go over the boards again to smoothly cover where I spackled and sanded. At the end of this step you should have a BEAUTIFUL board and batten wall!
Once the paint is fully dry, I added these wall hooks to the top horizontal board!
Shop my Entry Looks!
Click here to shop my entry looks!