If you’re like me, you’ve got a thing for fireplaces. They’re the sweet spot between function and beauty. Plus, they’re THE most fun to style! So naturally I NEEDED one. I did quite a bit of research on electric fireplace inserts and settled on this one. It comes in a lot of different sizes, it’s super sleek and affordable considering it’s a functioning heat source! And you literally just plug it in an outlet and it works.
This tutorial and the frame measurements are based off the 25 63/64″ x 23 3/16″ insert. I also need to mention that I did not do this project all by myself. My jack-of-all-trades father-in-law, hereby referred to as Steve-o, came to the rescue and basically whipped this baby up in a few hours. *Bless him* This project does require some power tools and a basic knowledge of math and fractions (which I do not possess).
Alright, let’s do this!
TOOL LIST:
+ Nail Gun
+ Level
+ T-Square
PRODUCT LIST:
+ A box of 1/4 in drywall screws
+ 2 pieces metal corner beading for drywall
+ 1 gallon all-purpose joint compound
+ 1 quart of paint of choice (we used our wall color Paint & Primer in one Ultra Pure White by Behr in a flat finish)
Total cost for us was around $500 including the insert because we had all the tools and extra sheetrock left over from a previous project. It could cost you less or more depending on what you already have on hand and the size of your insert. If you don’t have these power tools, most are available to rent at hardware stores like Home Depot and Lowes.
STEP ONE | FRAMING
There is no one “right” way to frame your fireplace. It can look different for everyone, depending on how high/low and wide you want your frame to go. But there are a few things to keep in mind if you’re using the PuraFlame electric insert:
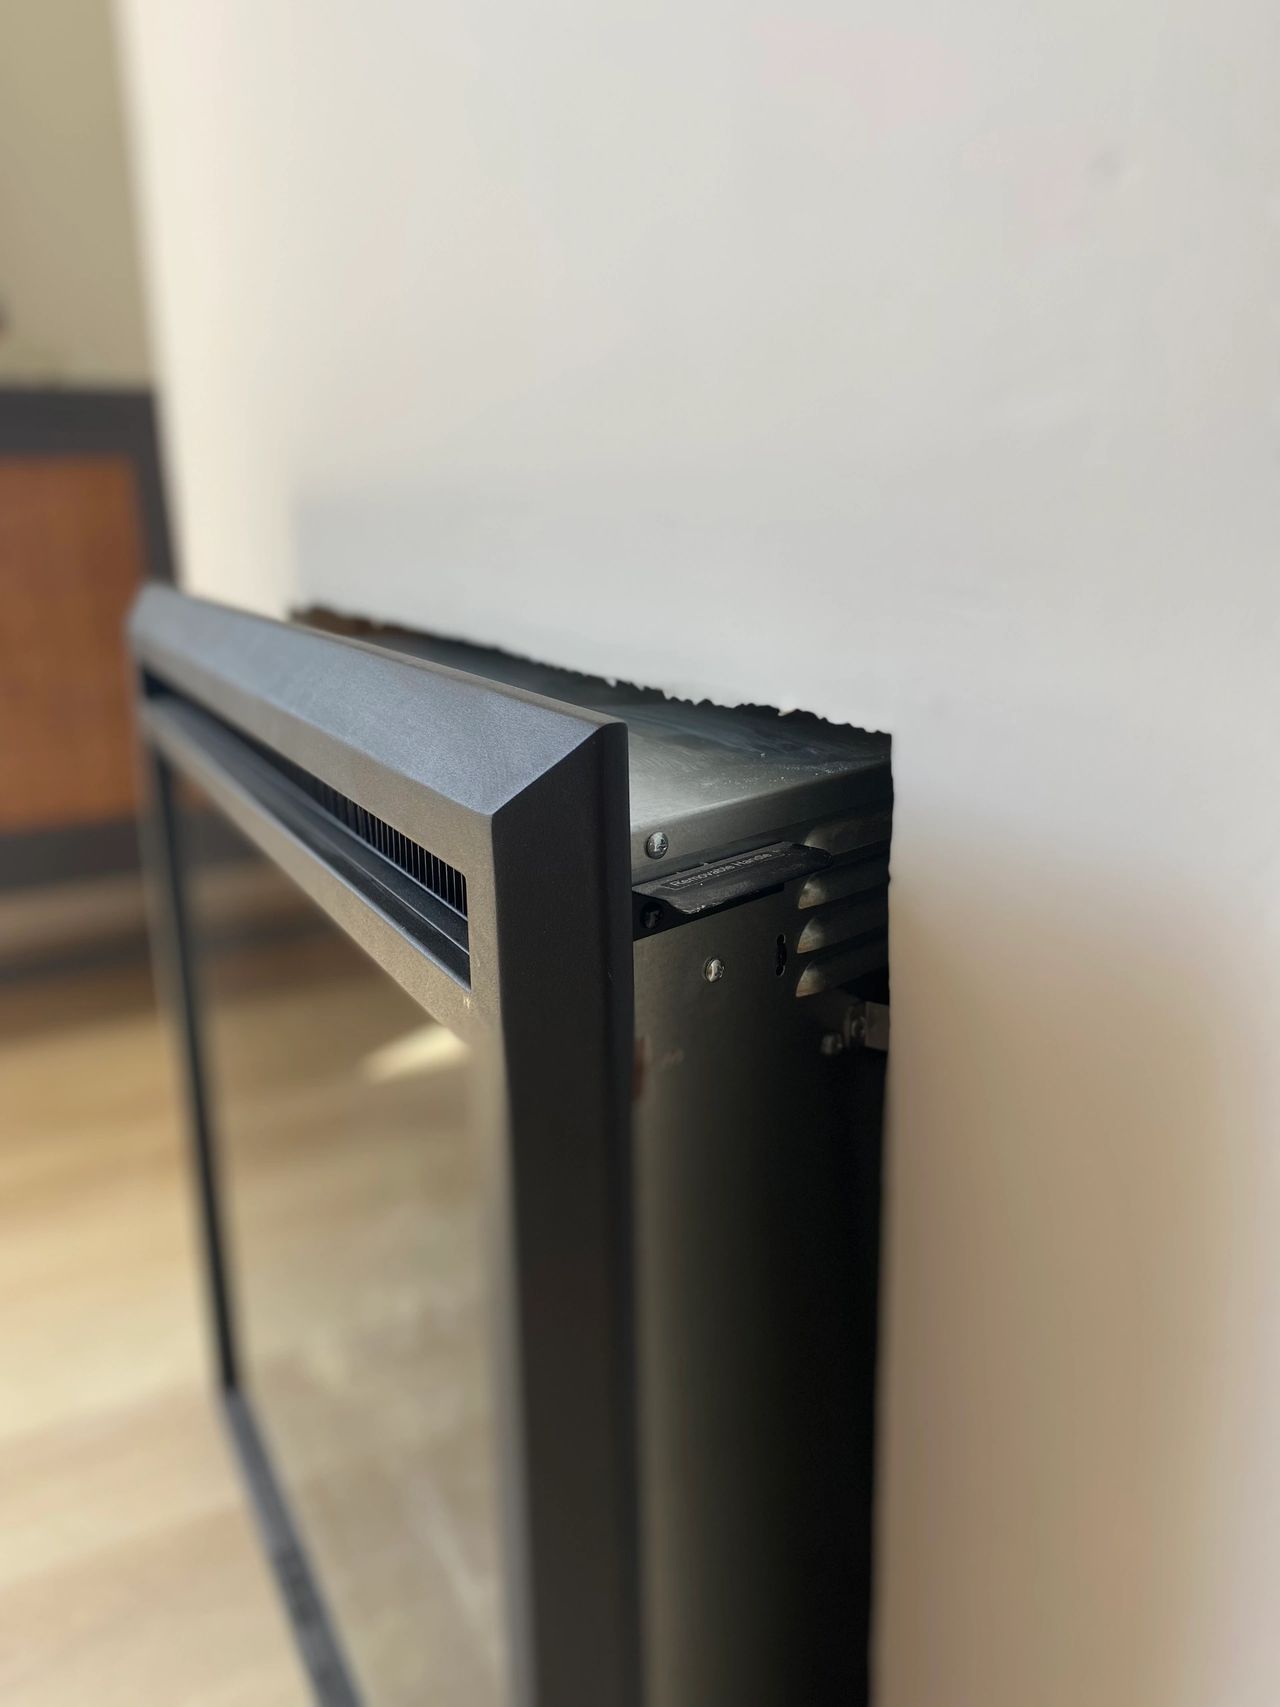
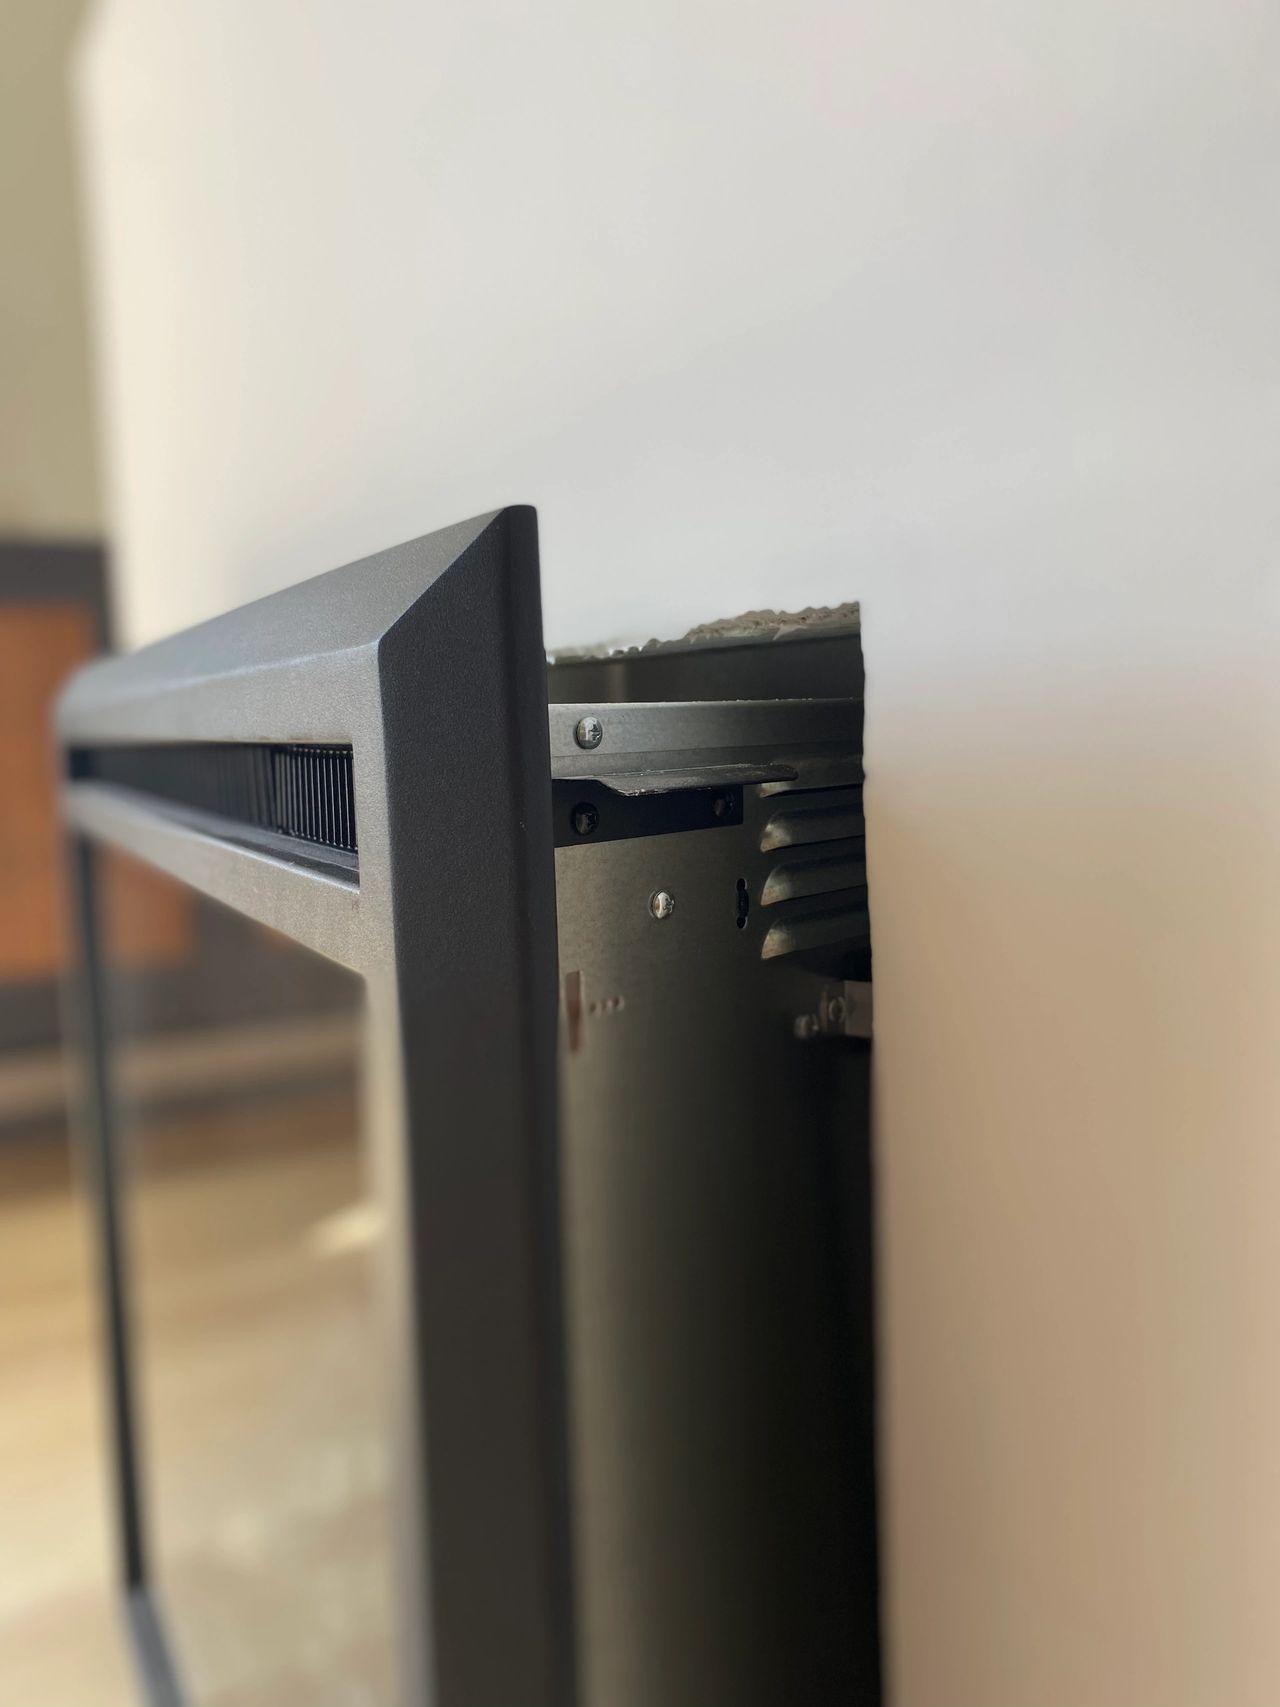
- Make sure you’re leaving an inch on the back and the sides of the fireplace for ventilation purposes. This was suggested by the customer service associate we called to make sure we didn’t need to add a separate vent. They assured us that leaving enough room surrounding the insert is all it requires!
- Make sure you’re creating a stable frame that has enough 2×4 surface to screw in the sheetrock.
- This specific insert required at least 8 inches in depth, which is why we built our frame out exactly 8 inches from the wall.
- Make sure you’re next to an outlet and frame around it so that the cord is hidden inside the frame!
OUR FRAMING PROCESS:
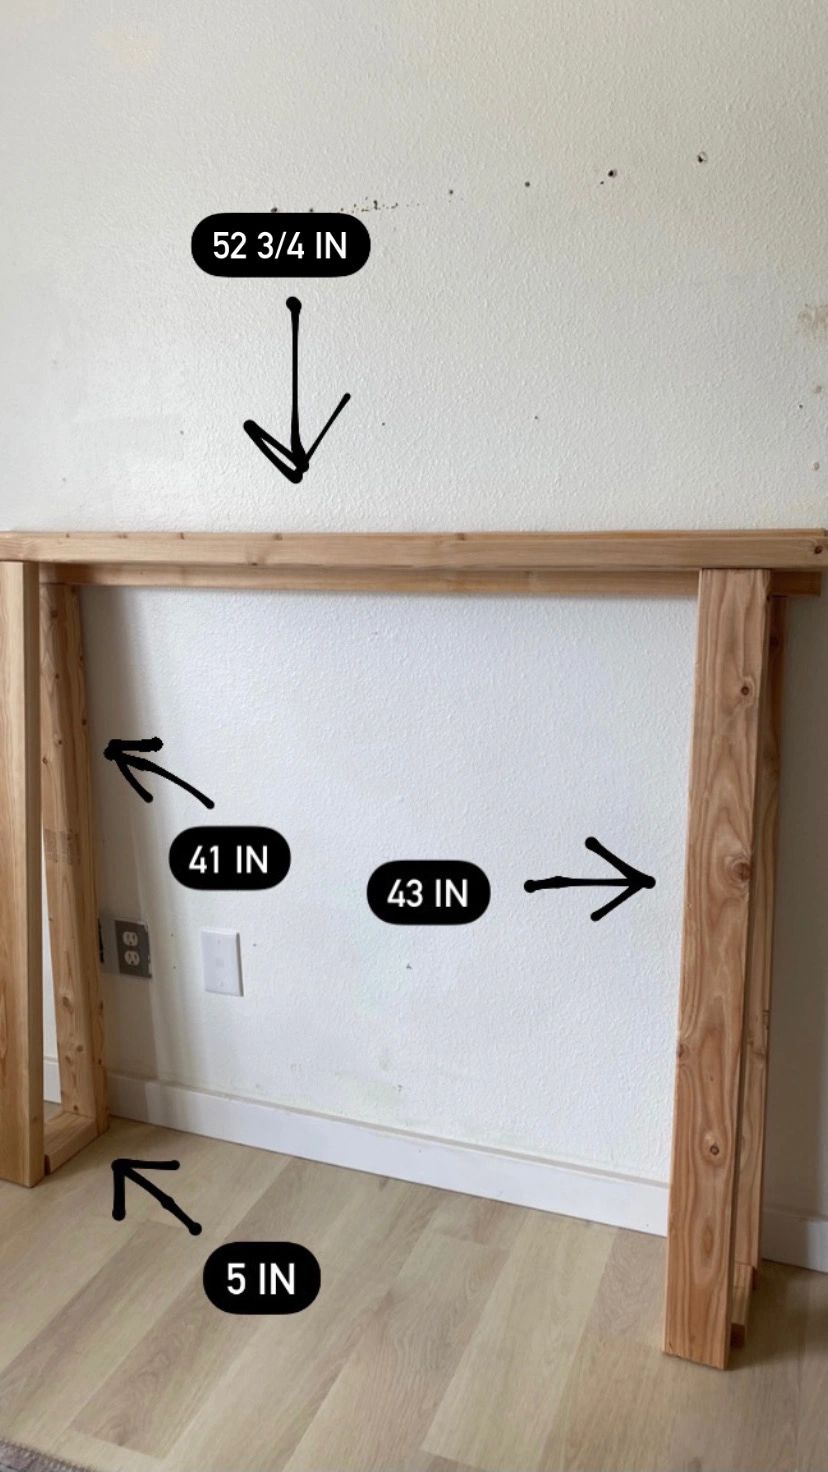
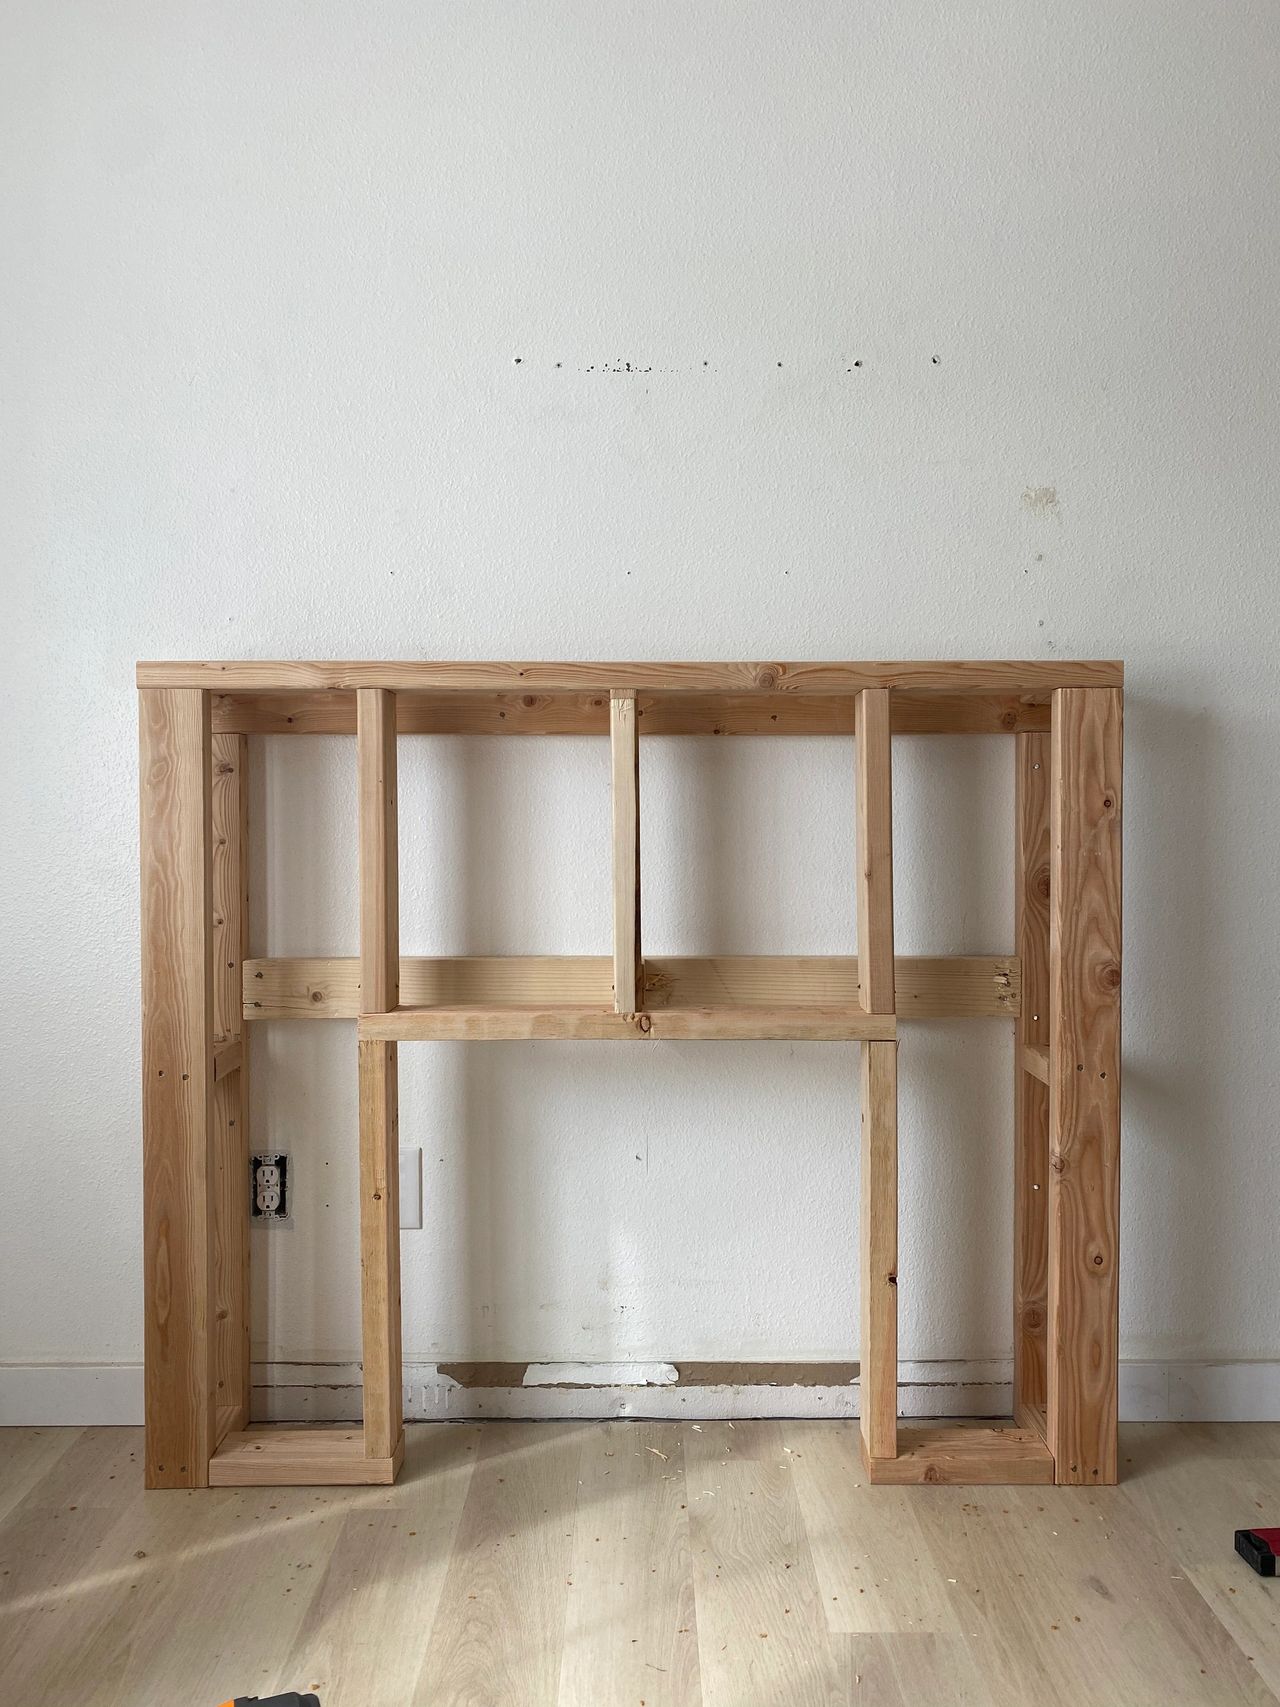
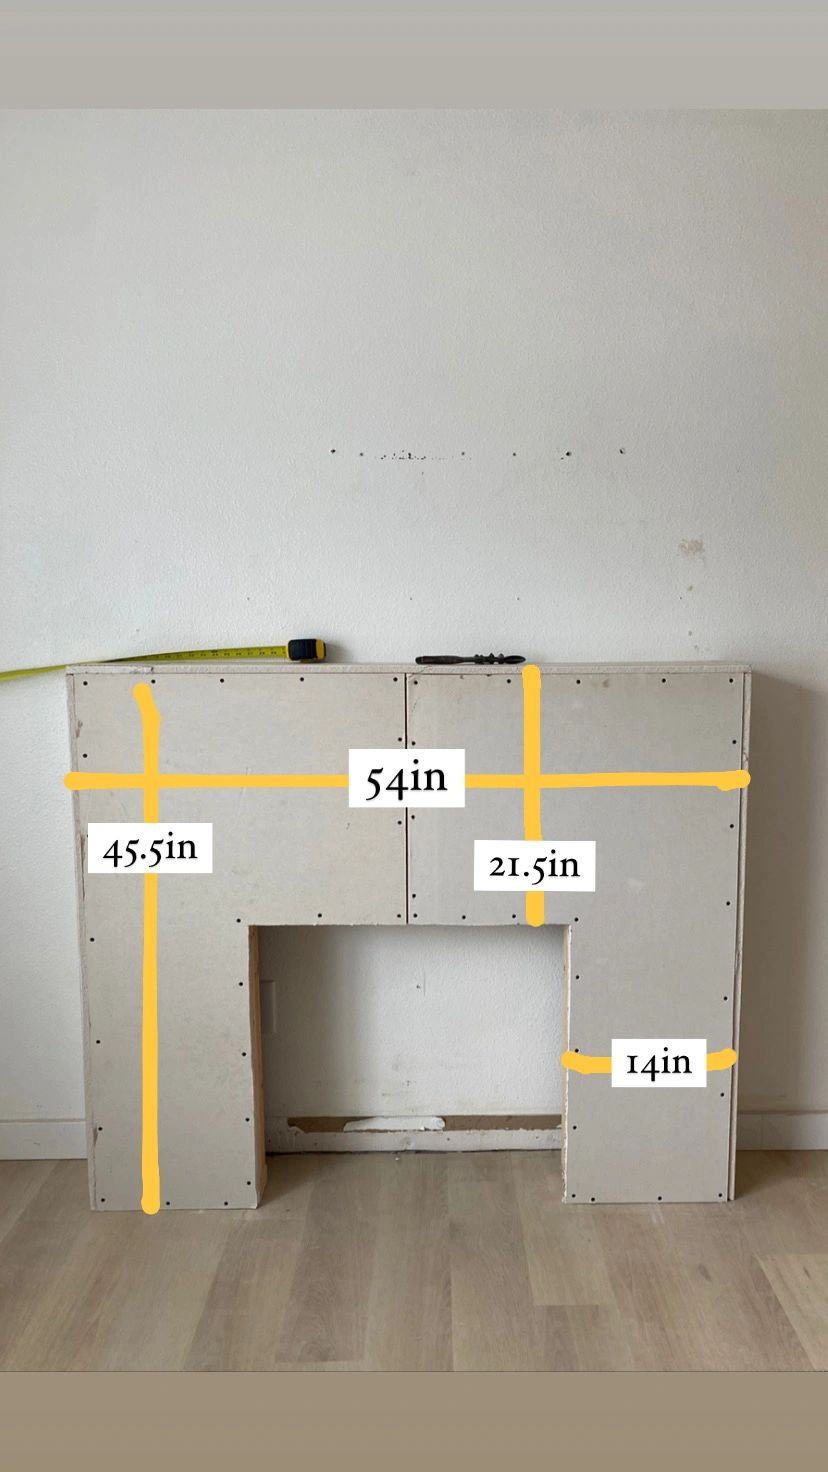
1. I decided on the width and length I wanted and Steve-o cut the beginning pieces to these measurements:
- 2 2×4’s for front of frame at 43 inches
- 2 2×4’s for back of frame at 41 inches (two inches shorter than the front so that the top 2×4 in the back can be upright making it easier to nail into the wall).
- 2 2×4’s for the top of frame at 52 3/4 inches (Originally we were going to add a 54in mantel, which is why this measurement is so precise).
- 2 2×4’s for the bottom + top at 5 inches
See photo below:
Next, depending on the size of your insert, cut 2×4’s to frame around the insert to connect to the outer frame (remembering to leave an inch between the 2×4 and the insert for ventilation). See image below:
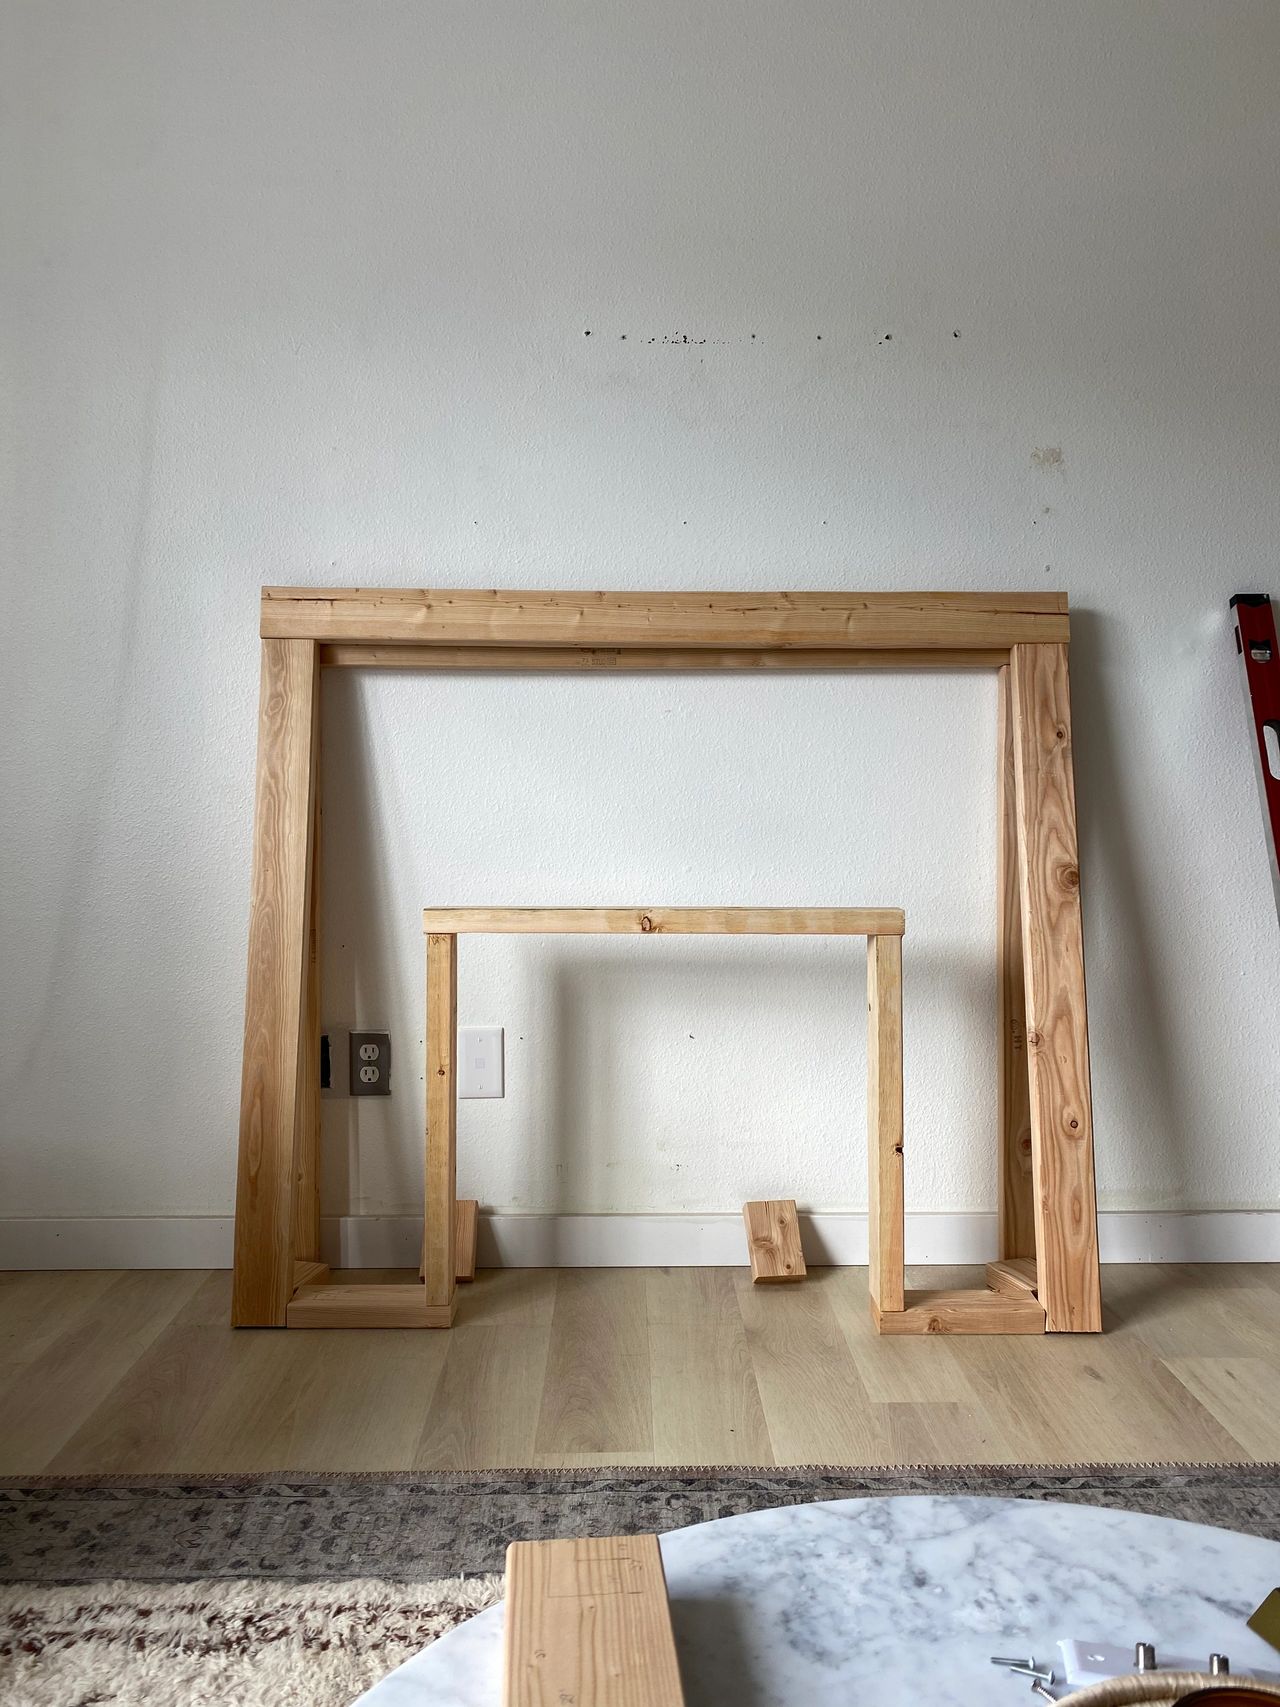
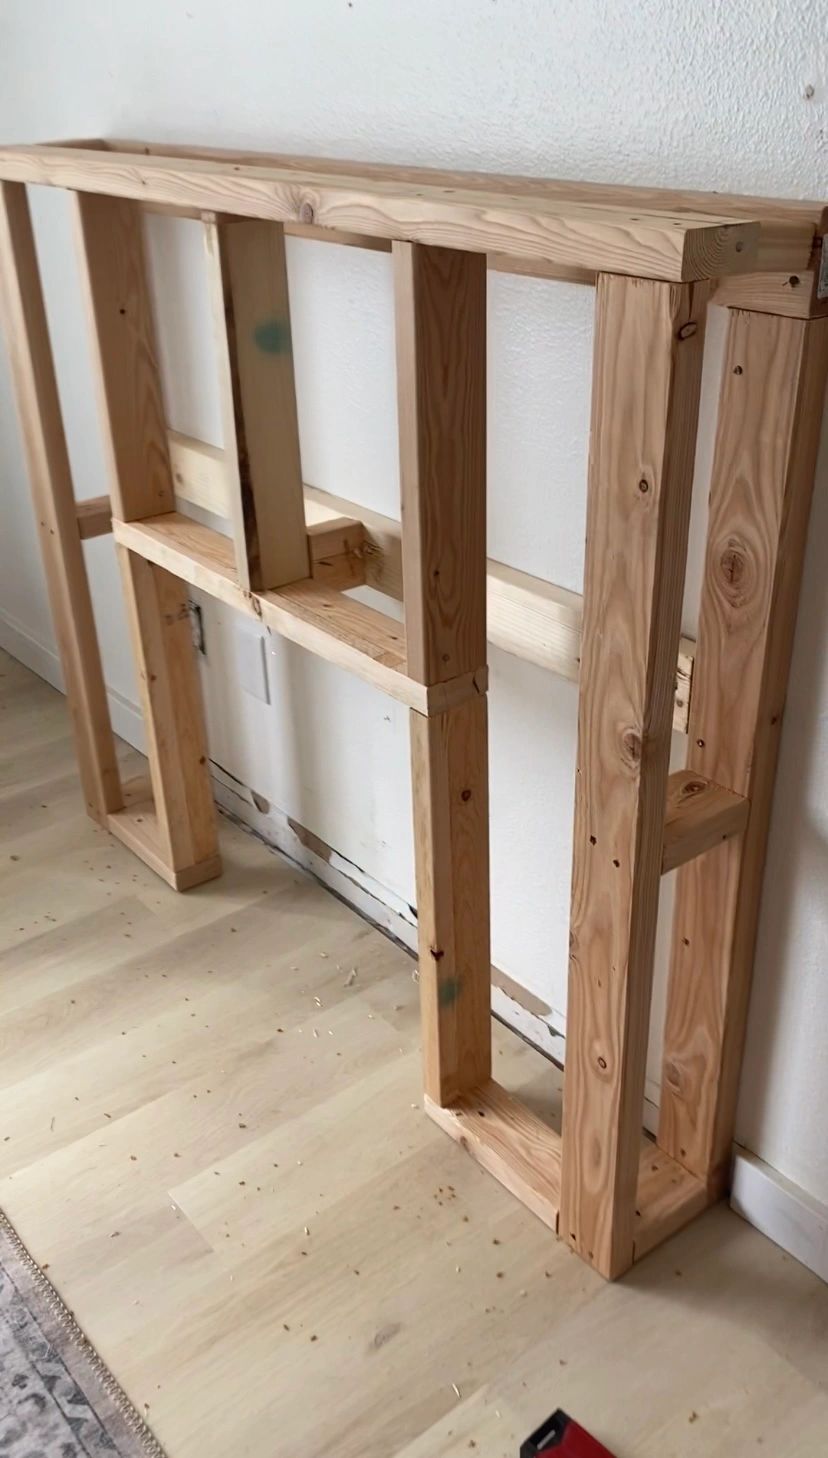
Once we had those pieces mapped out, we began to put the frame together using a nail gun and the 2 1/2in common nails. It was helpful to have two people during this part to help stabilize. Steve-o used a t-square through-out this project to make sure the corners were 90 degrees. Thanks, Steve! He then added in pieces in the middle of the frame so that we could attach the sheetrock in multiple places.
Using the same common nails, we attached the frame to the wall, making sure to hit the studs! Steve’s a sucker for stability, so he added a second 2×4 to the back of the frame to attach to the wall. Here’s how it looked all framed out and attached:
STEP TWO | SHEETROCK
Steve-o added sheetrock using an impact driver and sheetrock screws. He screwed in the sheetrock first and then cut around the insert area with a drywall handsaw.
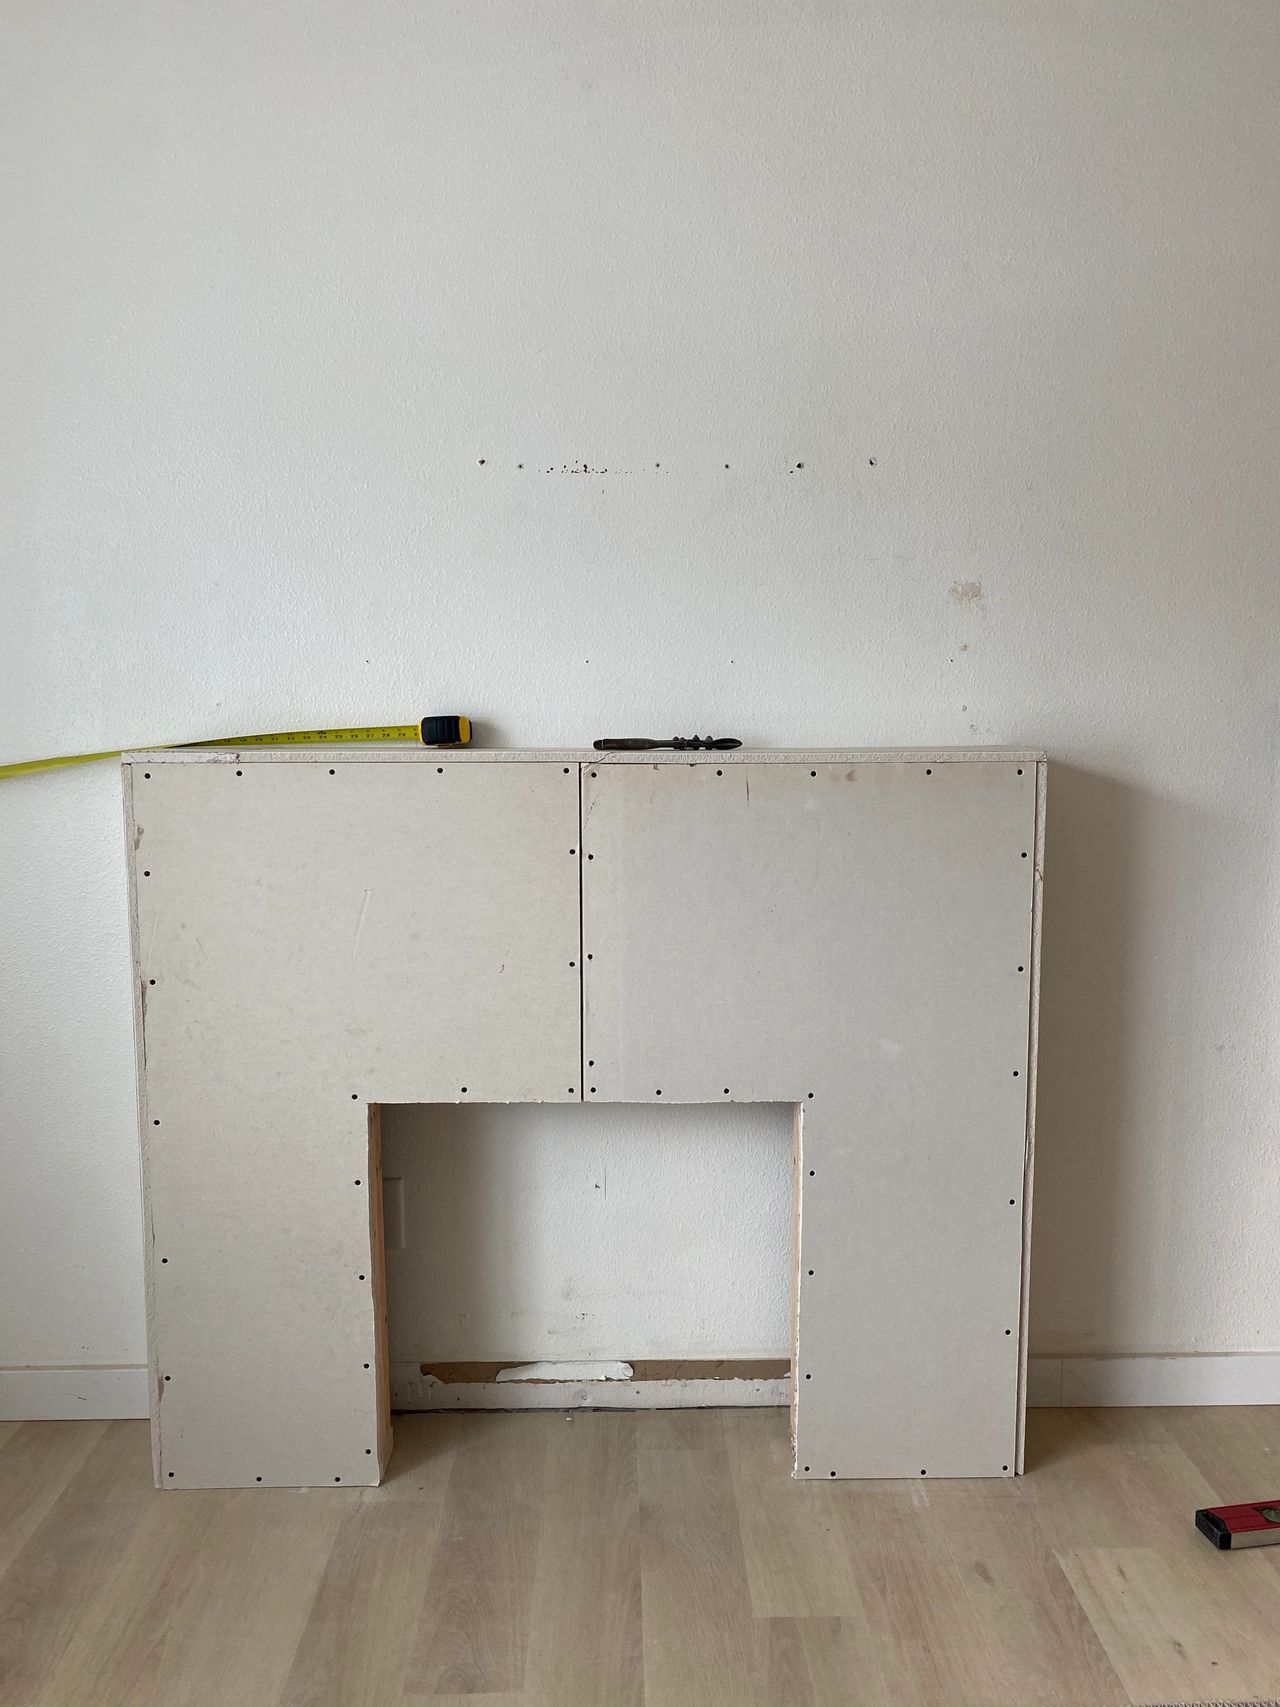
At this point our frame looked like this:

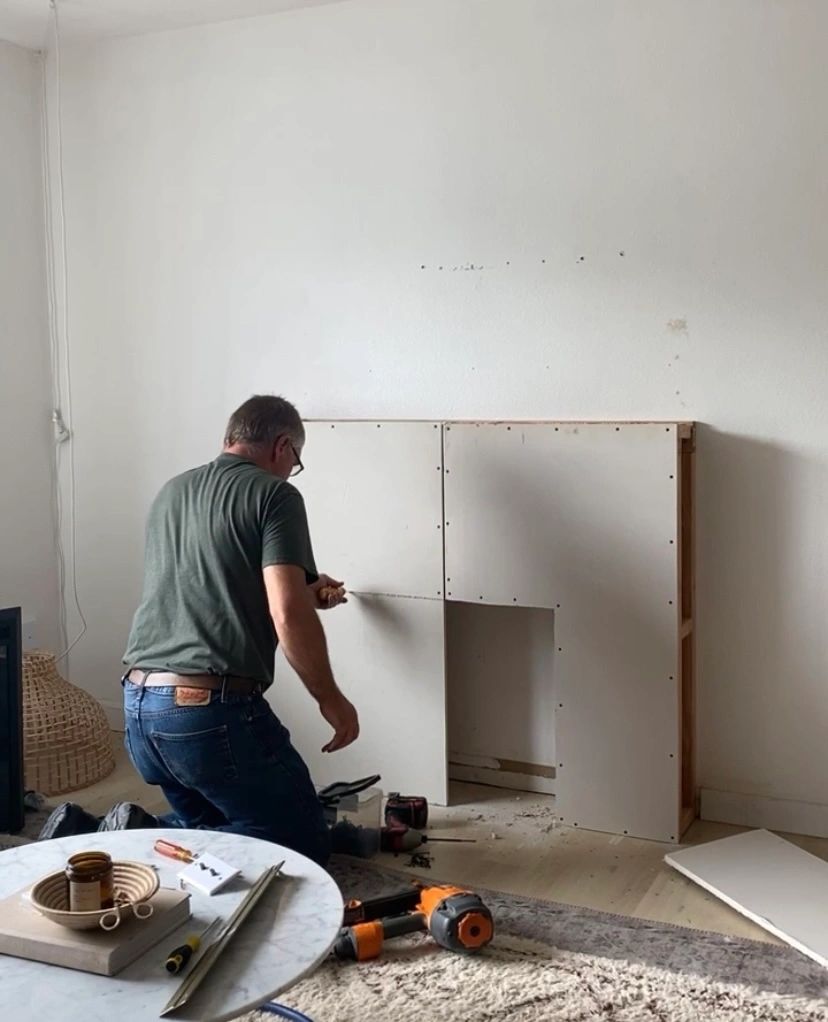
STEP THREE | MUD + TAPE
I didn’t record anything from this step because I figured if you’re reading this and you already know how to tape + mud drywall, you don’t need me to awkwardly describe it to you. And if you’re reading this and you don’t know how to do it, I added this super helpful video that goes into detail on how to do this step correctly!
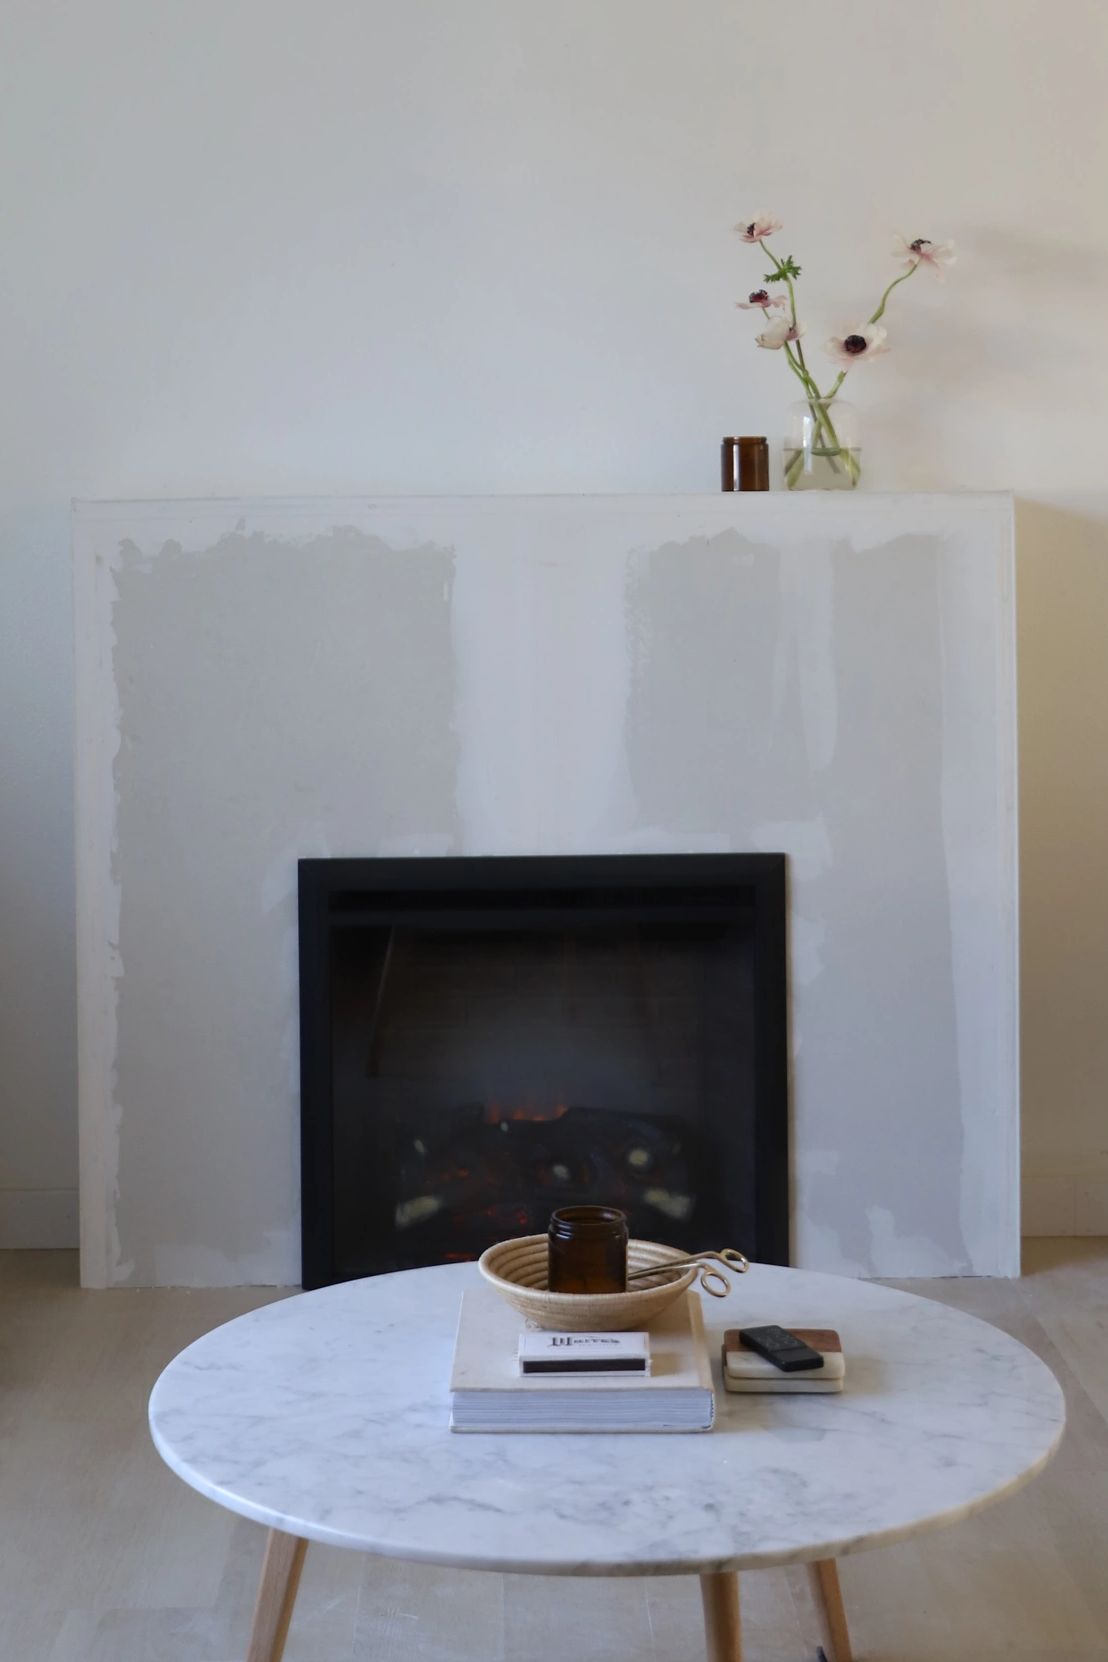
At this point in the project, I had to choose between leaving a smooth finish and painting, or adding some tile. I fell asleep trying to choose so I decided to add the smooth finish and see how I like it. If I feel like something is missing after living with it for a while, we’ll go in and add tile! To make the “smooth finish”, we just applied all-purpose joint compound (the same joint compound used in step three) all over the fireplace as evenly as possible. After it dried, I took the electric sander (180 grit) to it to smooth it out.
To finish it off I painted it with our wall color, Ultra Pure White by Behr in a flat finish. I used my favorite foam roller for even application and did three coats. Once that dried, I caulked all the edges where it attaches to the wall and floor and voila!!

FAQ’s about this project
(that were asked on my Instagram page)
1. “Could you also build one that is flush with the wall or would that look weird/ not work?” That would totally work! In fact, that was my original plan before Steve figured out that our wall depth was less that 8in (the required depth for the insert). Here was my original inspiration photo for a built-in fireplace:

2. “Does this insert give off good heat?” Yes! This insert is a legit heater. You can set the thermostat on it and it’ll turn on/off automatically depending on the temperature of your room. You can turn on the “fire” setting with or without heat, so it can be purely aesthetic or actually functional!
3. Does the insert just slide in and out? Yep! Like I mentioned earlier, it just needs an outlet to plug in to and we made sure to build the frame around the outlet so that the cord could be hidden inside the frame. So it’s not permanently attached to the frame, just simply pull it out and unplug!
4. Doesn’t it overheat the structure around? Is it safe? We were concerned about this too, but after reading the manual and speaking to their customer service, they assured us that all it needs is at least an inch on all sides to properly ventilate. (I attached some images below of what that looks like). This insert has great reviews and has been around for many years, so we feel good about it!